- AVID Eleven Rack Обзор гитарного процессора
- Обзор №1
- Форма акустической гитары и ее влияние на звук
- The Basics of Setting Up a Guitar Rack System with Cases and Proper Mounting
- The Difference between Combo Amps and Standalone Power or Preamps
- Which setup is better?
- Guitar Rack System Signal Processing Options
- Option #1: Amateur Hour
- Option #2: Separating the Preamp/Power Amp and Speaker
- Option #3: Separating the Preamp, Power Amp and Speaker Cab
- Option #4: Adding Rack Effects for Guitar
- How do they control rack effects from somewhere else?
- Getting a Guitar Rack Case that will Hold your Gear
- How do I install rack units in the case?
- Guitar Rack System Idea #1: The Modern Hard Rocker
- Guitar Rack System Idea #2: The Lead Electric Player with Pedals
- Guitar Rack System Idea #3: The Metal Head Rack
- Guitar Rack System Idea #4: The Classic Rocker
- Some More Real Life Examples
- Slash’s guitar rack system
- Joe Garvey of Hinder
- Dan Donegan of Disturbed
- What about wireless units?
- How tricky is the wiring for all this stuff?
- Linear signal processing in a guitar rack system
- What else can be mounted in a rack system?
- Your Examples
- Additional Resources
- About Bobby
- Comments
- LEAVE A COMMENT Cancel reply
AVID Eleven Rack Обзор гитарного процессора

AVID Eleven Rack – рэковый гитарный процессор. Модель дает возможность получить любое нужное звучание благодаря использованию эффектов, эмулирующих десятки популярных гитарных и басовых усилителей и педалей эффектов — Fender, VOX, Marshall, Soldano, Bogner, Mesa/Boogie и другие. Eleven Rack дает естественные ощущения при игре, как будто Вы подключаетесь к настоящему усилителю. С его помощью можно сочинять музыку, записывать выступления, а затем редактировать аудио материал и создавать миксы.
В комплекте с AVID Digidesign Eleven Rack поставляется годовая лицензия на использование программного обеспечения Pro Tools для работы со звуком. Модель совместима с PC и Mac. Процессор отличается широкими возможностями коммутации, позволяя подключать различные инструменты, микрофоны с возможностью фантомного питания, а также другое аналоговое и цифровое оборудование. Помимо аналоговых входов и выходов для подключений предусмотрены интерфейсы MIDI, AES/EBU, S/PDIF. Eleven Rack заключен в прочный корпус черного цвета с яркими оранжевыми вставками, он предназначен для установки в рэк, высота – 2U.
Эмулируемые усилители в процессоре AVID Eleven Rack:
’59 Tweed Lux
’59 Tweed Bass
’64 Black Panel Lux Vibrato/Normal
’66 AC Hi Boost
’67 Black Duo
’69 Plexiglas 100W
’82 Lead 800 100W
’85 M-2 Lead
’89 SL-100 Drive / ’89 SL-100 Crunch / ’89 SL-100 Clean
’92 Treadplate Modern/’92 Treadplate Vintage
DC Modern Overdrive—Avid custom amp
DC Vintage Crunch—Avid custom amp
’64 Black Vib
’65 Black Mini
’65 Black SR
’65 J45 Marshall JTM45
’67 Plexiglas Vari The Marshall Super Lead “Plexi”
’68 Plexiglas 50w
’69 Blue Line Bass
’97 RB-01b Red, Blue, and Green
DC Bass—Avid custom amp
DC Modern 800—Avid custom amp Marshall JCM800
DC Modern Clean—Avid custom amp
DC Modern SOD—Avid custom amp
DC Vintage Clean—Avid custom amp ʼ66 VOX AC30
DC Vintage OD—Avid custom amp
Эмулируемые кабинеты в процессоре AVID Digidesign Eleven Rack:
4×12 Classic 30—based on an ’06 Marshall 1960AV 4×12″ with Celestion Vintage 30s
4×12 Green 25W—based on a ’68 Marshall 1960A with Celestion G12H “Greenbacks”
4×10 Tweed Bass—based on a ’59 Fender Bassman 4×10″ with Jensen P10Qs
2×12 AC Blue—based on a ’66 VOX AC30 2×12″ with Celestion Alnico Blues
2×12 Black Duo—based on a ’67 Fender Black Face Twin Reverb 2×12″ with Jensen C12Ns
1×12 Black Lux—based on a ’64 Fender Black Face Deluxe Reverb 1×12″ with Jensen P12N
1×12 Tweed Lux—based on a ’59 Fender Tweed Deluxe 1×12″ with Jensen P12Q
8×10 Blue Line—based on an Ampeg SVT 8×10 with «towel bar»
4×12 Green 20W—based on a Marshall 4×12 with Celestion Heritage G12M speakers
4×12 65W—based on a Marshall 4×12 with original issue Celestion G12-65 speakers
4×10 Black SR—based on a Fender Super Reverb 4×10 with CTS Alnico speakers
2×12 B30—based on a Bogner 2×12 with Celestion Vintage 30 speakers
2×12 Silver Cone—based on a Roland JC-120 2×12
1×15 Open Back—based on an Ampeg Reverberocket 1×15 with Jensen C15N speaker
1×8 Custom—based on a Fender Champ combo amp speaker
Технические характеристики AVID Digidesign Eleven Rack:
Converters 24-bit
Sample Rates 44.1, 48, 88.2 and 96 kHz
Analog Input 1 XLR Mic Input with 48V Phantom Power
1 x 1/4″ TS True-Z
2 x 1/4″ TRS Line
2 x 1/4″ TRS FX Loop Return
Analog Output 2 x XLR Main
2 x 1/4″ TRS FX Loop Send
2 x 1/4″ TS output to Amp
Digital Input 1 x XLR AES/EBU
1 x RCA coaxial S/PDIF
Digital Output 1 x XLR AES/EBU
1 x RCA coaxial S/PDIF
MIDI I/O 2 x 5-pin, DIN MIDI In, MIDI out/thru
Sync I/O AES/EBU
S/PDIF
Headphone Output 1 x 1/4″ TRS
Dimensions (WxHxD) (48.3 x 34.3 x 8.9 cm)
Обзор №1
Интерфейс понятный,пресетам посвящён отдельный сайт)
Сейчас сделали отдельный интерфейс для редактирования пресетов.Скачал, установил .
(Раньше были танцы с бубнами,а именно сначала про тулс ставишь,потом ещё чёто и только через про тулз можно было редактировать пресеты с компа)
По звуку это мне кажется индивидуально. Но могу сказать что точно лучше чем Line 6 Pod Hd 500 Каждому нужно решать-Пластик ,цифра или же окололамповость.
Меня пока устраивает AVID Digidesign Eleven Rack. Хотя использую только для записи.
Для концертов всё же лучше ламповую голову свою иметь.
Играл через петлю в каком-то Маршале. Перегрузы некоторые в AVID Eleven Rack заметно цифровые.
Для записи очень удобен.Выбрал пресет обозвал дорожку название пресета и всё)Ничего искать ,вспоминать настройки итд не нужно..У меня идёт так — Eleven rack->spdif ->Spdif m-audio c400->PC
Общая оценка 7 из 10.
Источник
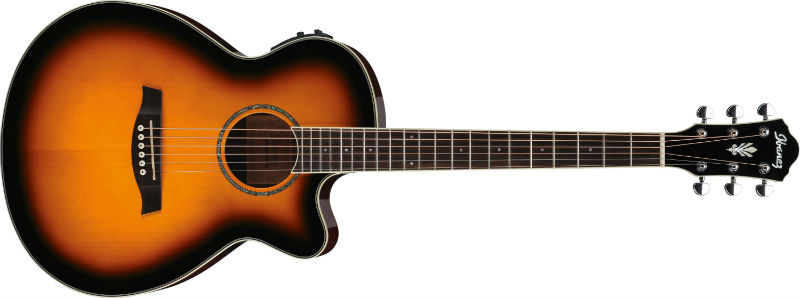
Форма акустической гитары и ее влияние на звук

Заходя в музыкальный магазин, неискушенный покупатель может растеряться. Количество представленных акустических гитар впечатляет даже искушенного музыканта, а начинающий гитарист и вовсе теряет дар речи. Как во всем этом многообразии найти тот инструмент, который подходит именно вам? Вот бы поиграть на них на всех и выбрать, но всегда ли есть на это время? Ориентироваться при выборе по цене – это в целом верное решение, но есть еще один нюанс, о котором начинающие музыканты могут не знать. Форма гитары оказывает большое влияние на звук, и если вы представляете какое звучание вам нужно, знание того, какая форма инструмента (тип корпуса) ему соответствует, поможет значительно сузить круг поиска.
Дредноут (Dreadnought)
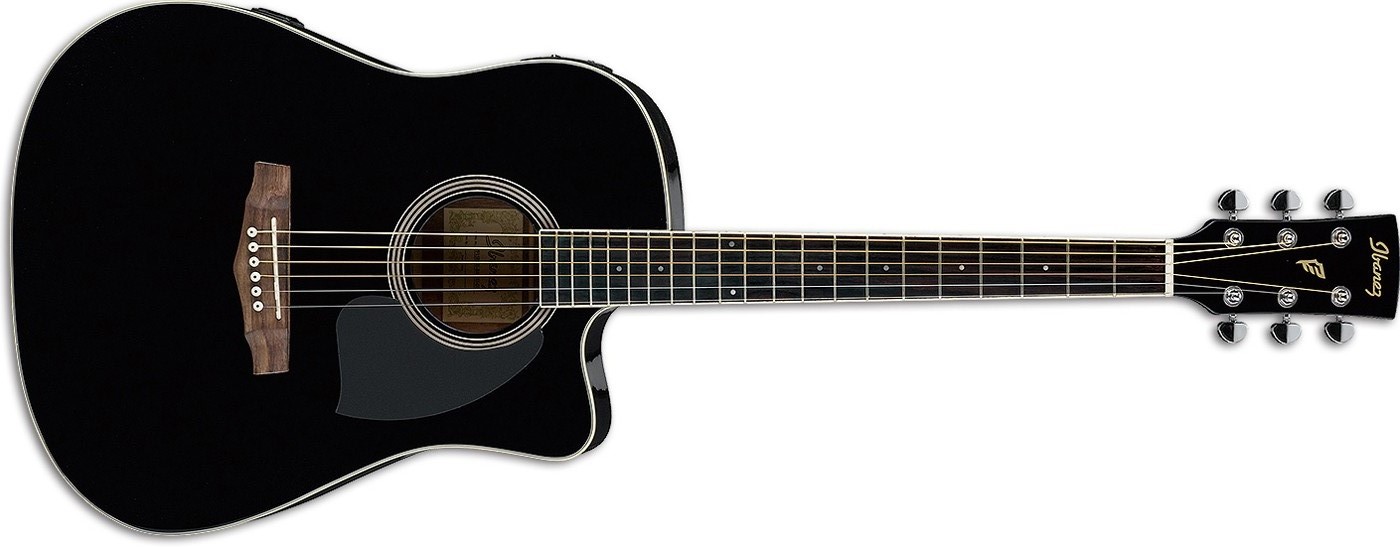
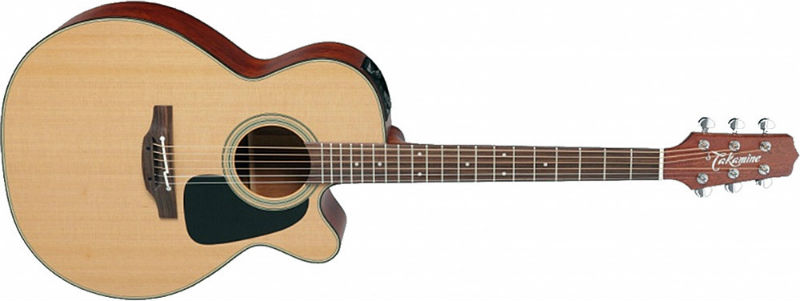
Сегодня это самый популярный тип корпуса. Разработан он был в 20-х годах прошлого века фирмой Martin и стал особенно актуальным для музыкантов в стиле кантри, блюз и эстрадной музыки. Дело в том, что по сравнению с классической формой Orchestra, которая была распространена в то время и подразумевала использование гитары в составе оркестра (что следует из названия), дредноут гораздо лучше подходил для сольных выступлений в качестве единственного аккомпанирующего инструмента. Корпус дредноута увеличен по сравнению с Orchestra, плюс дополнительно увеличена задняя часть. За счет этого звук получается более громким, более звонким и с мощными басовыми частотами. На дредноуте удобно играть как пальцами, так и медиатором, при игре аккордами инструмент звучит мощно и динамично – сегодня это фактически стандарт для исполнителя авторских песен и просто любителя гитары. Практически беспроигрышный вариант для тех, кто не имеет более узкоспециальных задач и хочет получить просто хороший звук. Эту форму еще часто называют «вестерн» или «кантри», хотя надо сказать, что многие специалисты подразумевают под вестерном абсолютно любую акустическую гитару с металлическими струнами, а для стиля кантри характерны не только дредноуты, но и джамбо, о которых пойдет речь ниже. Характерным примером дредноутов может служить TAKAMINE PRO SERIES 1 P1DC . Среди недорогих гитар можно порекомендовать Yamaha F130. Рекомендуем также обратить внимание на Ibanez PF15ECE.
Gibson в свое время разработали свои варианты дредноутов, так называемый «дредноут с округлыми плечами», самой первым и знаменитым представителем которого стала легендарная Gibson J45 и «дредноут с квадратными плечами», воплотившийся в не менее легендарный Gibson Hummingbird.
Orchestra (Auditorium)

По сути, это одна и та же форма корпуса, просто разные производители называют ее по-разному. Этот корпус несколько меньше чем дредноут и более удобно лежит в руках. Характерным является наличие четко выраженной зауженной «талии» инструмента. Исходя из названия, можно понять, что предназначены гитары, прежде всего, для игры в оркестре, хотя, конечно, сфера их применения гораздо шире. Дело в том, что в оркестре важно не только то, чтобы инструмент звучал хорошо сам по себе, но чтобы он еще и не мешал другим инструментам, залезая в чужой частотный диапазон. Поэтому, в отличие от дредноута, гитары Orchestra звучат не так насыщенно в низких частотах и верхах, и в целом – несколько тише. Зато их преимуществом является идеальная сбалансированность по частотам. Звука каждой частоты в них ровно столько, сколько нужно. Поэтому музыканты очень любят использовать эти гитары в студии – спектр звучания получается очень правильный. Характерными представителями можно назвать TAKAMINE P3MC ORCHESTRA или Sigma OMM-ST+.
Некоторые производители, например, Crafter, предлагают увеличенный вариант этого корпуса, который называется Grand Auditorium. Это форма, характеризующаяся хорошим частотным балансом и при этом звучащая довольно громко и полнозвучно.
Парлор (Parlour)

Очень элегантные и изящные гитары. Небольшой корпус, весьма удобно лежащий в руках, идеально гармонирует с музыкой романса или задушевной романтичной баллады. Эти гитары называют еще женскими, ведь именно женщины любят все элегантное. Плюс, благодаря уменьшенному размеру корпуса, женщине или девушке удобно держать такую гитару в руках. Звук у парлора довольно мягкий и ненавязчивый, что хорошо сочетается с негромким романтичным голосом. Благодаря своим небольшим размерам, гитары с формой парлор любят туристы, взять с собой в поход парлор гораздо удобнее, чем, например, дредноут. В качестве примера и фактически идеального инструмента с корпусом парлор мы можем рекомендовать TAYLOR GS MINI-E WALNUT GS MINI или более дешевый вариант Fender CP-60S.
Джамбо (Jumbo)

Это самая большая и самая громкая из всех акустических гитар. Она была разработана фирмой Gibson, до сих пор одна из самых популярных джамбо в мире производится этой компанией и называется Gibson J-200. Хотя, надо сказать, Gibson пошли еще дальше и предлагают сегодня уже еще более увеличенный вариант корпуса под названием Super Jumbo. Корпус джамбо превосходит по размерам даже дредноут, а нижняя часть джамбо увеличена даже по сравнению с огромными размерами самого инструмента. При этом «талия» корпуса несколько заужена, как у Auditorium, благодаря этому звучание джамбо довольно сбалансированное. Очень популярны 12-струнные варианты джамбо, обладающие наиболее насыщенным звуком. Единственным недостатком джамбо можно назвать большие размеры, из-за чего на такой гитаре не всегда удобно играть людям небольшой комплекции, а также очень громкий звук, что может иногда быть помехой при занятиях музыкой дома. Если вы желаете приобрести джамбо, обратите внимание на Gretsch Rancher.
Фолк (Folk)
Если с формами Drednaught, Auditorium и Jumbo все понятно, то с гитарами типа «фолк» ситуация довольно запутанная. Дело в том, что разные производители понимают под этим термином довольно сильно отличающиеся друг от друга инструменты. Нам ближе понимание фолк-гитары как довольно небольшого и изящного инструмента, более всего похожего на парлор, но не с такими округлыми формами. Типичным примером такой гитары может считаться YAMAHA CPX600 .
Slim (Thinline)
Собственно говоря, это не тип корпуса, а характеристика, указывающая на то, что корпус гитары более узкий, чем стандартный. Slim может быть как дредноут, так и аудиториум и джамбо. Как правило, гитары с таким, более тонким корпусом, имеют звукосниматель и предусилитель и используются для выступления на сцене. Их акустические свойства не такие выдающиеся, как у гитар со стандартной глубиной, но они значительно легче и удобнее. А при игре через усилитель акустические свойства самой гитары не так уж важны. В качестве примера такой гитары можно привести TAKAMINE TSP138CN .
Далее нужно упомянуть так называемые трэвел-гитары (travel). Это инструменты с уменьшенным корпусом (не только с уменьшенной глубиной как slim, но уменьшенные пропорционально). Такие инструменты предназначены для поездок и походов. За счет небольшого корпуса они занимают меньше места и этим удобны. Звучат они, соответственно, тоже несколько «меньше» аналогов.
NEX
Интересная форма, предлагаемая компанией Takamine. Корпус NEX представляет собой нечто среднее между Jumbo и Auditorium.
AE
Это уже разработка другой компании, а именно – Ibanez. Форма AE очень напоминает NEX и тоже похожа на несколько уменьшенную Jumbo. Форма AE имеет характерную форму выреза и более плавные контуры. Среди гитар AE можно выделить превосходную премиальную Ibanez AE900-NT, а в бюджетном сегменте стоит обратить внимание на Ibanez AE315-NT.
Конечно, звучание гитары определяется не только формой, но и выбором древесины, качеством изготовления, наличием выреза, струнами и еще множеством других факторов. Однако понимание того, какие тенденции звучания имеет каждая из форм, поможет вам в поиске вашей идеальной гитары. Надеемся, эта статья была для вас полезной.
Источник
The Basics of Setting Up a Guitar Rack System with Cases and Proper Mounting
Written by Bobby October 16, 2020 17 Comments

Most guitar players start out with a setup that goes something like this:
You have a guitar, a cable, a small (maybe mid-sized) combo amp and perhaps a pedal or two. But what you’ll quickly realize is that the pros (and most who have been playing for an extended period of time) don’t set their gear up that way.
In fact, their rigs look quite different.
Take Herman Li’s amp and speaker cabs, for example:
Herman Li’s guitar rig. Image via Guitar.com
This looks nothing like a guitar rig most of us would own. Fair?
Further, Li has a number of rack mounted units:
Herman Li’s pedalboard and rack setup. Image via Guitar.com
We don’t see a combo amp running a simple pedal line. In fact, Li’s setup looks incredibly complex. Enough so that many might be turned off from even attempting to set up a similar rig.
There’s also the issue of expense.
Li’s rig is, undoubtedly, burdened by a heavy price tag.
But what if I said you can setup a guitar rack system that is structured similarly? Moreover, what if I told you that it would be reasonably affordable?
If we can take the mystique and the complexity out of these systems, boiling them down to a few basic components, than it’s easy to see how we can setup our own guitar rack systems at an affordable price and benefit from their versatility. For a look at a recording setup that involves simpler components, checkout our home instrument recording guide.
The Difference between Combo Amps and Standalone Power or Preamps
To understand Li’s rig, and rack systems in general, it helps to know what a guitar amp actually is.
Let’s say you buy a combo amp, like the following:
This «amp» is actually three different functioning pieces:
While these three functions get throw into the term «guitar amp» the only actual amplification is the power amp segment.
The job of the preamp and the speaker actually have little to do with what is technically amplification. Thus, the act of throwing all three of those roles into one amplifier, isn’t always the most optimal way to setup your guitar rig.
In Li’s rig, he has three different components, each handling only one of these roles.
- Mesa Boogie Power Amp
- Rocktron Prophesy Effects Processor (doubling as a preamp)
- Peavey Speaker Cabs
Which setup is better?
Now, I should be clear:
There is nothing wrong with going the combo amp route. Because, clearly, it has some major advantages in certain situations. It’s cheaper, easily transported and a lot quicker to setup and take down.
Moreover, many of the most popular guitar amps of our day are combo amplifiers.
Combo amps do have limitations and are not the method that most professionals choose to use.
In many cases, guitar players will at least separate the power amp/preamp from their speaker cab via what’s called an «amp head,» pictured below:
This can be, and often is, part of a guitar rack system as it can fit into most cases.
The real advantage is that amp heads give you a lot more flexibility and customization options with your rig. You can choose one brand for a speaker cab, another for a preamp/power amp.
The pros often take advantage of this because it allows them to leave their amp heads in one spot, while speaker cabs can be moved somewhere else entirely.
So, the question of which setup is better is situational.
What I’ll do here is show you your options and help you setup a guitar rack system that isn’t overly complex, is reasonably affordable and works in your situation.
Guitar Rack System Signal Processing Options
Let’s just take a minute to review your guitar rig options.
The first, and more obvious choice that we looked at earlier, is the combo amp plus a few effects pedals setup.
It’s the «de facto» choice for most beginner guitar players:
Option #1: Amateur Hour
In this scenario, the power amp, preamp and speaker are all combined in the combo amplifier, while some effects may or may not be added for basic signal processing between the guitar and amp.
Option #2: Separating the Preamp/Power Amp and Speaker
At this point we still don’t necessarily have a rack mount system, though we’ve taken the step of separating our preamp/power amp and speaker cab, giving us some flexibility with both pieces.
Option #3: Separating the Preamp, Power Amp and Speaker Cab
Now it should start to make sense why players need a case to hold all of this stuff. We now have a power amp, preamp, speaker cab and effects pedals all separated into their own unit.
Speaking of pedals, we can still take our guitar rack system one step further by adding an effects processor.
Option #4: Adding Rack Effects for Guitar
Now we have a digital rack mount effects processor, which is how most professionals deal with basic effects.
You’ll notice that many of them will run just a few pedals (wah is a good example) from the floor, while the rest of their effects are housed in a case.
How do they control rack effects from somewhere else?
If you go back to our Herman Li rig, you’ll notice a large floorboard with numerous little buttons.
This is called a MIDI controller, which allows you to control a unit like the TC Electronic G Major, or any other multi-effects rack processor, from the floor.
A few examples of good MIDI controllers include:
These units allow you to program and engage whatever rack effects you’re using, which is why you almost always see a MIDI floorboard on professional guitar rigs.
It’s just a much easier and more streamlined setup.
Adding the MIDI controller expands are guitar rack system to the following:
What you see here is the core of any guitar rack setup, with the preamp and power amp often combined into the amp head we showed you earlier.
It’s how almost every professional guitar player sets things up.
While there are plenty of other rack mount units to discuss, let’s review the core of our setup so far:
- Separate power and preamp or power/preamp combo
- Speaker cab
- Rack effects processor
- MIDI foot controller for effects processor
Getting a Guitar Rack Case that will Hold your Gear
Getting a case to hold all of this stuff is what’s often the most confusing aspect of setting up a guitar rack system and knowing what to buy.
Though again, it’s surprisingly simple once you know what to look for.
Rack cases will have either open slots or drawers where you can place pedals and/or rack units. The number of slots and drawers can vary, though most will have between five and 12 slots, with one or two drawers.
This rack case from Seismic Audio has 12 spaces for rack units and one drawer that locks.
Assume that an amp head will take up two or three spots (it’s higher than most rack units) leaving you with ten for other units and the drawer which can hold pedals or simply function as a junk drawer.
How do I install rack units in the case?
If you look closely at a front shot of the case, you can see lines of holes on either side:
Now, look closely at the front of the TC Electronic G Major:
These holes will correspond to the ones in our case, allowing us to attach the rack unit to the case, rather easily.
Once everything is in, the result will look something like this:
The number of rack units you want to run will determine what kind of case you buy.
The number of slots in each case will vary, while the vertical size of many rack units will also be subject to change. However, getting a case that holds between eight and 12 rack units is fairly standard.
Other variables include the drawers I mentioned, which can be added and removed as needed, as well as the wheels feature.
It should be evident by now that this gives you a massive amount of flexibility with how you design your rig. Particularly for musicians who perform live on a regular basis, this setup is extremely useful and versatile.
Now that we’ve seen how to setup a guitar rack system, let’s look at a few rig arrangement ideas and templates that might work for you.
Guitar Rack System Idea #1: The Modern Hard Rocker
In this rig, we have a power amp, preamp (with built-in effects) and the noise suppressor, giving you all the basics with room in an 8-rack case for additional units.
It’s a great build for the minimalist hard rocker who wants to have effects and preamp functionality consolidated, along with the extensive control offered by the MIDI foot controller.
Here’s a list of everything in the diagram:
Guitar Rack System Idea #2: The Lead Electric Player with Pedals
Note that the Boss pedal pictured in the top right side of the diagram is simply meant to signify the likelihood of a pedalboard and not specifically the Boss Harmonist.
Since lead guitar players often use a lot of effects, we have a digital effects processor running into a feedback controller. All of this is pushed by an Orange Amplifiers head that runs into a 4×12 Fender speaker cab.
A MIDI foot controller (for the effects processor) and noise reduction system are added to round things out.
Guitar Rack System Idea #3: The Metal Head Rack
In the «metal head» version I swap out the Orange amp head and Fender cab, replacing them with a Randall RD100H and a Marshall slanted cab.
Guitar Rack System Idea #4: The Classic Rocker
For the classic rocker, the amp head is a Marshall DSL100 paired with the Marshall slanted cab.
I’ve added a cheaper effects processor with a smaller MIDI controller to make room for a few more stompboxes. The Rocktron Hush provides some noise control, as per usual.
Now, keep in mind:
All of these are just examples that I came up with to give you an idea of how you might piece together a guitar rack system that fits your specific needs.
Part of the beauty involved with putting this kind of system together is that it’s uniquely your own and completely fluid. In other words, there’s no right or wrong way to do it.
There are plenty of instances where «rules» can be broken.
Tool’s Adam Jones has been known to use a bass cab with his rig.
It’s easy to see that once you get this many pieces into a guitar rack system there’s a lot of experimenting and mixing and matching that can occur.
To give you a few more ideas about how these systems are put together, I’ll walk you through some real life examples.
Some More Real Life Examples
Flickr Commons Image via Theleom
What I always find helpful when trying to setup anything, guitar gear especially, is to look at what other people are doing, take a few notes and then go do something similar.
With guitar rack systems, I find that an especially helpful tactic.
Part of the reason I don’t like doing it from scratch is because there is an infinite amount of ways it can be done.
My personal preference is to look at a template, take a few ideas I like, then go make my own way, which is what we’ll do with these examples.
Let’s start with a guitarist you probably recognize.
Slash’s guitar rack system
A shot of Slash’s signal Marshall amp heads. Image via Moshcam
In Moshcam’s rundown of Slash’s (Saul Hudson) rig with Ace (Slash’s guitar tech), we see a fairly simple setup consisting of the two Marshall JCM heads.
One is the Slash Signature, while the other is a traditional JCM800.
The two that sit to the right of Ace in the photo are backups to the originals.
Otherwise, Slash’s rack system is just a pedalboard that sits atop the amplifiers where all the pedals are controlled backstage by Ace (wah pedal excluded).
A shot of Slash’s pedalboard. Image via Moshcam
For all his success, Slash has a remarkably simple setup. One thing that isn’t showcased in the Moshcam video is a remote wah pedal processor, which allows Slash to use multiple wahs at different points on stage.
Otherwise, it’s a basic Marshall amp outfit.
Joe Garvey of Hinder
Joe Garvey, Hinder’s lead guitar player, relies heavily on a rack guitar system that’s similarly structured to some of the examples we’ve provided.
First, his pedalboard is almost entirely controlled by a Voodoo Lab MIDI foot controller:
The Voodoo Lab MIDI foot controller on Joe Garvey’s pedalboard. Image via Premier Guitar
This floorboard is the control point for an Avid Eleven Rack effects processor, which is the heart of Garvey’s tone and signal processing.
There are two of them in this picture (the two orange boxes):
Avid Eleven effects processor which is controller by the Voodoo Lab Ground Control. Image via Premier Guitar
All of Garvey’s amp models and effects come from the Eleven Rack (the second one is a backup), which then runs directly into the speaker cabinets and monitors.
Garvey avoids the typical amp head setup in favor of relying entirely on has Eleven Rack which does all the preamp work, in addition to handling effects processing.
Dan Donegan of Disturbed
Disturbed’s guitar player, Dan Donegan, runs his signal through a setup that looks complicated, though is actually quite close to the diagrams I showed you earlier.
First, his signal goes through Randall preamps and a DigiTech effects processor, which you can see in the picture below:
A look at Dan Donegan’s Randall preamps and DigiTech effects processor. Image via Premier Guitar
The signal is then powered by Randall RT2 tube power amps.
Donegan’s Randall power amps. Image via Premier Guitar
Finally, Donegan’s signal lands at this speaker cab (not sure about the brand), which has four microphones total (one for each speaker) and is enclosed in a box before it’s sent out to the mains at Disturbed’s concerts.
Donegan’s speaker cab and microphones. Image via Premier Guitar
A few pedals and the DigiTech effects processor are all controlled through a Voodoo Lab MIDI foot controller, which is the same model we saw being used in Garvey’s rig.
Donegan’s MIDI controller on his pedalboard. Image via Premier Guitar
- Voodoo Lab Ground Control
- DigiTech Whammy Pedal
- Randall RT2 Power Amps
- DigiTech GSP1101 Effects Processor
- Randall RM4 Preamps
What about wireless units?
In a lot of these rigs, you might notice wireless receivers, since the pros almost never go without them.
Usually that’s not a necessary component for a small time rig, whether you’re running everything into a rack case or not.
While you can get some cheaper wireless receivers, my advice would be to run a cable and put your money into some other aspect of your guitar rack system. Wireless just doesn’t help you much if you’re not performing in a larger capacity.
The Line 6 rack-mountable wireless receiver.
If you do decide to add a wireless receiver to your rig, they’ll usually take up one or two rack spots, similar to the effects processors and noise gates.
Line 6 and Shure both make some solid wireless units that are decently priced.
How tricky is the wiring for all this stuff?
When you look at the pro rigs, you’ll often see a lot of wires and what looks like a complicated mess.
The first thing to keep in mind is that this sort of thing always looks messier and more complex than it actually is. If you watch the Premier Guitar Rig Rundown videos, you’ll notice that the «neatness» of a rig will often depend on the personality of the guitar tech.
So, don’t assume that just because the wiring looks a bit chaotic that you can’t do it yourself.
It’s often quite simple.
Remember, your signal is linear , which means it runs in a straight line from beginning to end.
Linear signal processing in a guitar rack system
This means the signal is relatively easy to track.
Just like a conventional pedalboard, everything will still have one input and one output.
Linear i/o (cable routing) in a guitar rack system.
This is even easier to see in the TC Electronic G Major setup manual, which gives a simple reference graphic that applies regardless of which effects processor we might be using:
Guitar rack system setup example. Image via TC Electronic
If you look at it this way, wiring and cables are fairly straightforward.
Make sure you separate all your wires into two categories:
- Electrical Currents
- Signal Processing
Electrical wiring would include pedal power (9V cables) and any kind of adapter or power plug that needs to be accounted for.
These should all be kept separate from signal processing cables, which would include MIDI cabling, instrument cables and patch cables between pedals or rack units.
Keeping them distinct makes everything much easier to manage.
What I like to do is wire all the necessary instrument cables first, then come back in and do all the electric wiring, while taping down as much as possible to cut back on the mess.
What else can be mounted in a rack system?
For simplicity’s sake, I’ve focused primarily on the core elements of a guitar rack system. However, you can migrate anything that has to do with signal processing to a case.
For example, you can get any of the following components in a rack form:
- Equalizer
- Tuner
- Wah controller
- Compression
- Channel switching
At this point, it comes down to an issue of how much money you want to spend and how you want your rig to function.
Having a tuner and equalizer in a pedal form is cheaper, but there is a lot more versatility and flexibility to be had if you can migrate it all to a rack case.
I’d consider these items to be luxury inclusions, or fun additions for a later date.
Your Examples
If you have a rack system template to share, drop it in the comments section below.
This topic, while frustratingly vague, can often be made really simple by seeing what kind of rack systems other guitar players have been able to successfully build and set up.
Share what you know so everyone else can benefit.
Additional Resources
- Guitar.com/Rigs. A well-stocked archive of professional guitar player rigs that provide in-depth graphics and details that cover plenty of rack systems.
- Reverb. One of the largest music gear retailers also happens to be a great place to find used and boutique gear, like the Marshall 9100 power amp.
- The Eleven Rack quick setup guide. Even if you don’t buy this particular preamp, the setup guide provides a quick and convenient look into how to include an effects processor in a guitar rack system.
- Premier Guitar’s Rig Rundown’s. The rig rundown series from Premier Guitar offers some of the absolute best insight into guitar rack systems and professional rigs. This is where I got most of my examples.
About Bobby
Bobby is Guitar Chalk’s founder and a contributor at Guitar World. He has also developed content for PRS, Seymour Duncan and IK Multimedia. You can shoot him an email to get in touch.
Comments
Chris foe says
Can someone tell me what kinda rack setup armon amarth is useing for there death metal guitar sound I want to know
Brian says
Hi there Bob. Alright I have a few things in my rack I want to hook up properly. From bottom of rack to the top I have 6 units not counting the Furman P-1800 PF R that all are plugged into at the very top. OK The first is the amp, Marshall 9100. 2nd is a pre-amp Marshall JMP-1. 3rd is a Rocktron Prophesy 2. 4th is the Korg 1000 tuner. 5th Rocktron Hush. 6th is a BBE 362 Sonic Maximizer. If there is any way you can help me hook these up correctly, please do.
Bobby Kittleberger says
Hey Brian – how far have you gotten so far? You should start with the master output on the JMP-1 going into the 9100. Your Rocktron Prophesy and BBE could then go in the send/return from the JMP-1. Your tuner could probably be in the effects loop as well.
Does that make sense?
Brian says
Alright Bob if I understand this right this is what I have done.
JMP master out to 9100
Prophesy main out to BBE
BBE out to JMP effects return
and on rear of Prophesy there is a single out to tuner
Brian says
Bob also what has been stumping me is there is only one effects send not L/R effects send on the JMP-1. I’m not going to turn unit on until I hear from you Bob as I’ve hooked up as I said above, hopefully I understood you correctly.
What I was doing before I asked for help is, I only used Prophesy or disconnected and only used JMP-1. I could not figure out how to use these two together. I have no idea what goes in the rear of 9100 A/B remote voice switching. I have never had that on a amp before. Also on rear of JMP-1 is Speaker emulater L/R outputs, have no idea what that is or what that would go to.
Bobby Kittleberger says
Hey Brian – if there is only one effects send on the back of the JMP-1, that should go into the input of your first rack unit, then you would just treat your rack units like effects pedals, with the exception of the tuner.
From what it sounds like in your second post, you’ve got it setup right.
As far as the emulation and speaker outs on the back of the JMP-1, I don’t think you need those at this point. I assume you have a speaker cab attached to the 9100 (your power amp)?
Brian says
Yes I have 2 4×12 cabs hooked up, 1 in channel A and 1 in B of the 9100 set at 16Ohms. So the main out L/R of the Prophesy to BBE A/B input then BBE A/B out to JMP-1 effects L/R return is correct, not effects send L/R from Prophesy to BBE A/B input then BBE A/B output to JMP-1 effects return L/R. As far as the one effects out coming from JMP-1 the next in line unit would be the Prophesy so I guess it doesn’t matter what side effects return on the Prophesy it goes in L or R I put it in the R.
Bobby Kittleberger says
I think you’re right about the Prophecy. Shouldn’t matter which side. I’d say give it a try and report back.
Brian says
Hey Bob I appreciate the help. It ended up just as I thought the Prophesy and the JMP do not go together well. You have to use either one as both are pre-amps. If I used together I would have to unplug guitar from one then plug into the other every time just to get the benefits of either one. The Rocktron Prophesy 2 just has everything The JMP does not, not that the JMP is bad, just the RP-2 can do it all alone. We have come along way since the JMP came out. I think there is around 20 years difference in the two pre-amps. The JMP-1 OD2 is worth admission alone but The RP-2 wins hands down x 10.
CC says
i am currently considering building my first rack unit (always cab and stompbox guy). my question is, how does the MIDI control two preamps? I think i want to start with an ADA MP1 and ART SGX 2000 preamp then add something like a Mesa Boogie power amp for the monster low end.
I like to play all genres of music but Mainly rock and metal so should i consider another preamp?
I have a 50w 5150 head that i love but would this be to weak to power both preamps? Any help would be appreciated
Bobby Kittleberger says
Ok, first thing I would point out:
The 5150 head is a type of preamp. Adding the ADA MP1 and ART SGX 2000 would, in effect, give you three total preamps, where the SGX would be more of an effects processor.
I would do either the 5150 or the MP1, but not both. If you like the 5150, I’d say pair that with the SGX and be done with it.
If you want to use multiple MIDI devices (preamps or otherwise) you’d run a MIDI cable from the pedal to the input of the first device, then use a second MIDI cable going from the output of that device to the input of the next device. Strymon’s article here does a good job of covering it: https://www.strymon.net/using-midi-to-control-your-pedals/
Do you have a speaker cab you plan to use? Hope all this is helpful.
Reza Abdallah says
great article , Bobby …
greeting from Indonesia …
i have question regarding effect loop chain , currently i’m using mainly pedalboard effect for my live / studio session …
few days ago i’m just purchase 2nd hand Axe FX II XL+ with its MIDI foot controller & TC Electronic D-Two from my friend who just moving to Japan for study abroad …
but i’m also planning to expand my rackmount rig in the future by adding more rackmount device such as Mesa Rectifier Pre Amp , Mesa 90/90 Power Amp , EL8X Distressor & maybe Lexicon Reverb rack …
currently my pedalboard rigs is PolyTune 3 -> Strymon OB1 -> Dunlop DVP3 -> Dunlop CB535 -> EHX POG2 -> Strymon Sunset -> Strymon Deco -> Strymon Ola -> Strymon Timeline -> Strymon Big Sky -> Ditto X2 connected to Mesa Mark V Head ( which is have effect loop ) & Mesa Rectifier 4×12 cabinet for my studio session …
from what i understand based on article that you write above , can i running my configuration like this . …
Instrument -> Pedalboard -> Mesa Mark V head -> SEND to -> Axe FX II -> TC D-Two -> RETURN to Mesa Mark V -> Mesa Rectifier 4×12 cabinet
can i running configuration like i write above for my Live & Studio session ( so i can get best of both world ) or did i miss something . …
also , lets say my rackmount rig is complete by now & i’m configure it like this Mesa Rectifier Pre Amp -> Mesa 90/90 Power Amp -> EL8X Distressor -> Axe FX II -> TC D-Two -> Lexicon PCM 92 & want to use both pedalboard & rackmount rig …
can i running configuration like this . …
Instrument -> Pedalboard -> Rackmount ( via Mesa Rectifier Pre Amp 1/4 guitar input then SEND to Distressor -> Axe FX II -> TC D-Two -> Lexicon PCM92 -> RETURN to Mesa Rectifier Pre Amp ) -> Mesa 90/90 Power Amp -> 2 x Mesa 2×12 or maybe 2 x Mesa 4×12 cabinet
Bobby Kittleberger says
Reza – if I’m understanding you correctly, then yes, using the send/return in the Mesa is your best bet and a totally standard way to run everything you mentioned. Alternatively, you can place everything before your preamp, although many rack units require a send/return.
From what I can tell, you’re good to go. Sounds like a sweet setup.
Frank Johnson says
In a scenario where you use a self-contained Amp head like a JCM 800 into a speaker cabinet, when do you use the effects loop for signal processing effects vs placing the effects before the input of the JCM 800?
Bobby Kittleberger says
There’s no right or wrong here.
Conventionally, ambient effects are handled better in an effects loop, while everything else gets placed before the primary amp input. Typically, I refer people to this Strymon article that covers effects placement and has a couple awesome diagrams with effects loops: http://www.strymon.net/setting-up-your-effect-signal-chain/
In the second diagram, they throw a volume pedal and some modulation in the effects loop as well.
But again, this is just convention. Myself, I don’t typically use a send/return unless the effect specifically calls for it (some rack mounted units do).
Hope this helps.
Anonymous says
excellent post, thanks a lot.
Bobby says
Comment Policy: You’re down to leave a comment? That’s awesome. Keep in mind that comments are moderated and rel=»nofollow» is in use. Please avoid any spammy keywords or a domain as your name, otherwise your comment will be deleted. Let’s stay on topic, keep questions relevant and have a meaningful conversation. All the best.
LEAVE A COMMENT Cancel reply
ABOUT THE AUTHOR
Guitar Chalk’s Founder and Editor
Bobby has developed guitar and music-related content with a number of companies and publications, including Guitar World, Guitar Player, Harmony Central, Paul Reed Smith, and Seymour Duncan.
Источник